On the weekend of November 21st, I finally had the opportunity to be part of a hackathon. It was a caffine- and sugar-filled 27 hour internal event held by Thalmic Labs. As the makers of the futuristic Myo gesture control armband, our hacks naturally had to use it in some way.
T+00h - The Idea
To be honest, I actually didn’t have an idea of what to do until the morning of the hackathon. My initial plan was to take a crash course on Unity and build some Myo-controlled game. I’ve previously done game projects, but those were built from scratch and I’ve never used a game engine like Unity, so creating a Unity-powered game seemed like the logical next step in my to-do list.
Time to learn #Unity! #hackathon #27hours
— Lloyd Torres (@ImperatorTorres) November 21, 2014However, another co-op at Thalmic Labs — Kevin Lo — approached me with the idea of building an app that sends calls to different people based on Myo gestures. I’ve always wanted to make a “legit” useful app that’s on the Play Store, so the idea definitely intrigued me. We decided to team up and work on it as our hack. Since I’ve done a bit of Android app dev before at school, I was expecting this new project to be an easy task, and I would still have plenty of time to work on my Unity game idea as a side hack.
Boy was I wrong.
T+02h - Android Studio
First up was setting up Android Studio. We also had to download and install the Android SDKs as well - even with the office’s fast internet speeds, we didn’t finish setting up until two hours later. Having previously worked on Eclipse, I found that Android Studio is waaaaay better by leaps and bounds. It was nicer on inexperienced devs and didn’t seem to give out arbitrary errors like Eclipse. The IDE’s flow made a lot more sense and it felt much more interactive.
T+05h - Retrieving Contacts in Android
After a delicious lunch, Android Studio finally finished downloading everything and it was time to start working. Kevin worked on backend stuff while I worked on the app frontend.
As I set up my work environment on my Windows laptop, I realized that I had gotten used to having multiple desktops to work in - a feature commonly found in OS X and Linux. Having to put all of my windows into one desktop just felt so…restrictive. Grr. Guess that’s one feature I’m looking forward to in Windows 10.
Anyways, I first looked into retrieving contact details on Android. The Android developer site provides a good tutorial on this, and there’s a bunch of examples throughout the internet if you get stuck. It all revolves around the use of ContactsContract. Once you set your permissions in AndroidManifest.xml and import the necessary libraries, you’ll start with something like this:
Uri contactUri = ContactsContract.Contacts.CONTENT_URI;
Cursor cursor = getContentResolver().query(contactUri, null, null, null, null);
In our app’s case, we needed to get the contact’s name and phone number, so we used the cursor to query for those:
// retrieve name from cursor
int nameIndex = cursor.getColumnIndex(ContactsContract.CommonDataKinds.Phone.DISPLAY_NAME);
String name = cursor.getString(nameIndex);

// retrieve phone number from cursor
int numberIndex = cursor.getColumnIndex(ContactsContract.CommonDataKinds.Phone.NUMBER);
String number = cursor.getString(numberIndex);
Once you have the information you need, it’s simply a matter of putting it in some sort of View, which involves creating an Adapter to set up the layout for that View. The Android developer site again has a good tutorial on this, and there are plenty of examples out there if you’re left scratching your head.
T+07h - Or You Can Just Send an Intent
It took about two-ish hours to go from zero knowledge to having a ListView with the names and numbers of every contact on my phone. I was about to dive into setting up a fragment that allows users to select specific contacts on their phone when I had a sudden realization.
Spent two hours implementing my own contact list fragment. Forgot I can just send intent to default contacts app. #fail #android #hackathon
— Lloyd Torres (@ImperatorTorres) November 21, 2014I could simply send an intent to the Contacts app and let users pick from there, dammit! This had the advantage of looking much nicer (since the stock Contacts app looks way better than what I could come up with in 27 hours), and doesn’t require a lot of work. I scrapped a lot of my existing code, only picking the bits and pieces needed to get the contact name and number, and replaced them with this:
Intent pickContactIntent = new Intent(Intent.ACTION_PICK, Uri.parse("content://contacts"));
pickContactIntent.setType(ContactsContract.CommonDataKinds.Phone.CONTENT_TYPE);
startActivityForResult(pickContactIntent, PICK_CONTACT_REQUEST);
This launches the default contacts app and restricts it to only show contacts with phone numbers associated with them. Once the user picks something, I simply had to handle the incoming data through onActivityResult(). It’s much more elegant.
Once I figured this out, it was just a matter of setting up an OnItemClickListener() to check for user presses and calling the intent then. I also had to work with SharedPreferences to make sure that selected contacts aren’t deleted when the user exits from the app.
At this point we had been coding for a while, so we took a break to partake in other hackathon activities and to have some dinner.
T+10h - Prettification
After I finally finished the “contact selection” part of the app, I spent some time polishing some of the user experience.
I put in a feature allowing users to delete previously-selected contacts on long press. This involved using an AlertDialog and adding an OnItemLongClickListener() so that the dialog gets called whenever the app detects a long press. This was rather straightforward to implement.
I also started polishing the layout XMLs we were using to format our app’s UI. I went back into our Adapter for our ListView and adjusted the colours, sizes and arrangement of the TextViews we were using to display names and numbers. I also added in gesture icons as ImageViews for user friendliness. Playing around with the various XML values and going over best practices on implementing stuff took about an hour or so, with the help of Thalmic’s software team.
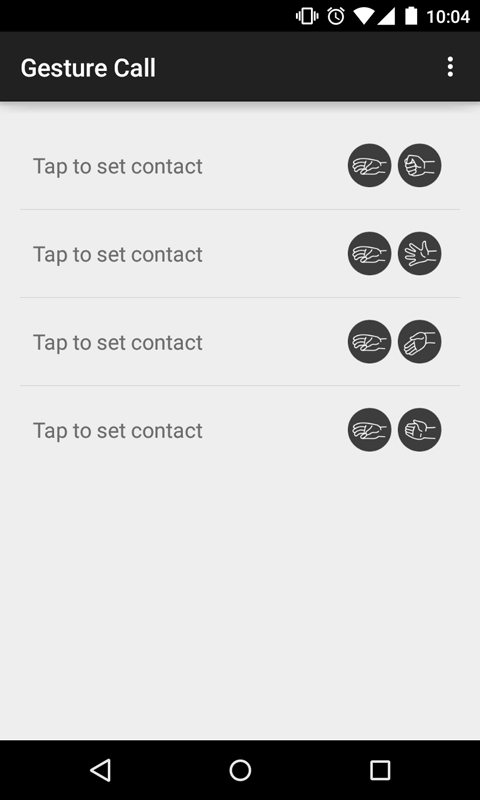
The UI still kinda looked rough but at least it would be useable once the backend was hooked up.
We went around the office to check out what other people had been working on. Kevin had the backend working on his side, while I had the frontend working on my side, so we also demoed what our app would be.
T+14h - Material Design
Sometime in the evening, I showed our app’s UI to Brent Bisaillion, Thalmic’s resident UI/UX designer. Possibly excited by the potential he saw, he joined us as our third member. He came up with a new UI design for our app based on Google’s new Material Design guidelines for Android 5.0 Lollipop, which is what ultimately ended up being our app’s final design. He also gave us a shinier app icon, which is almost identical to the current one used by the app. At this point, we also gave our app its final name — Myo Dialer.
I was excited to implement Brent’s new UI into Myo Dialer, since I’d been a fan of the new Material Design-based stock apps that Google had been pushing into Android prior to Lollipop’s release. However, it had only been a few days since the release of Lollipop, so there weren’t a lot of examples to work with. This didn’t stop me.
My hypothesis to building Material Design apps prior to starting was:
That was how I ended up implementing it, though I wouldn’t be surprised if there was a better way. My hypothesis was also backwards compatible with up to Android 4.3, which ensured that my app wasn’t limited to a few Lollipop devices.
The action bar’s colour can be set in res/values/styles.xml by adding the following under the <style> tag:
<item name="colorPrimary">[HEX_VALUE]</item>The status bar (being limited to Lollipop) can be set at res/values-v21/styles.xml by adding the following under the <style> tag:
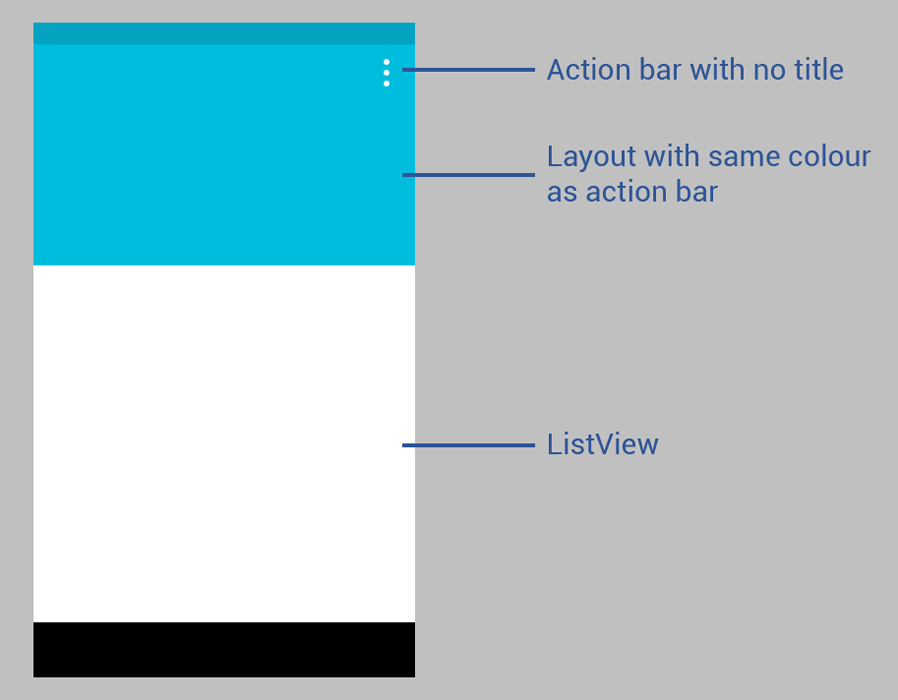
<item name="colorPrimaryDark">[HEX_VALUE]</item>Setting up the layout under the action bar was also easy — it’s just a RelativeLayout with content in it, all defined by XML. When I first implemented it, there was a lot of padding around it for some reason, but I discovered that this was caused by the overall LinearLayout that contained the RelativeLayout and the ListView. Transferring the padding values from the LinearLayout to its contents allowed the RelativeLayout to take up the width of the screen.
The most difficult part of this was actually getting rid of the title in the action bar. It seemed that no matter what I did, it would either break some other part of the app, or it would just refuse to go away. I eventually stumbled upon this solution, which is programatically called in onCreate():
getSupportActionBar().setDisplayShowTitleEnabled(false);I think my previous solutions did not work since my action bar is actually implemented programatically by extending ActionBarActivity.
There was also the matter of getting rid of the shadow generated by the action bar to make it seamless with the RelativeLayout. For that, it seemed that there were two different solutions for Lollipop and KitKat. On Lollipop, it’s similar to the programatic solution above:
getSupportActionBar().setElevation(0);On KitKat and lower versions, you can simply define it in styles.xml under the <style> tag:
<item name="android:windowContentOverlay">@null</item>Finally finished front-end after multiple revisions >_< #android #materialdesign #hackathon #6hours
— Lloyd Torres (@ImperatorTorres) November 22, 2014All in all, it took me four hours after Brent gave me the final design and assets to implement the Material Design UI. A lot of it was spent on reading through Google’s Material Design documentation and performing trial and error with the sparse examples available. I also had to make sure that my implementation was backwards compatible — there were cases where one solution would work on Lollipop but crash on KitKat. I had to throw out the code and find a solution that would work on different Android versions.
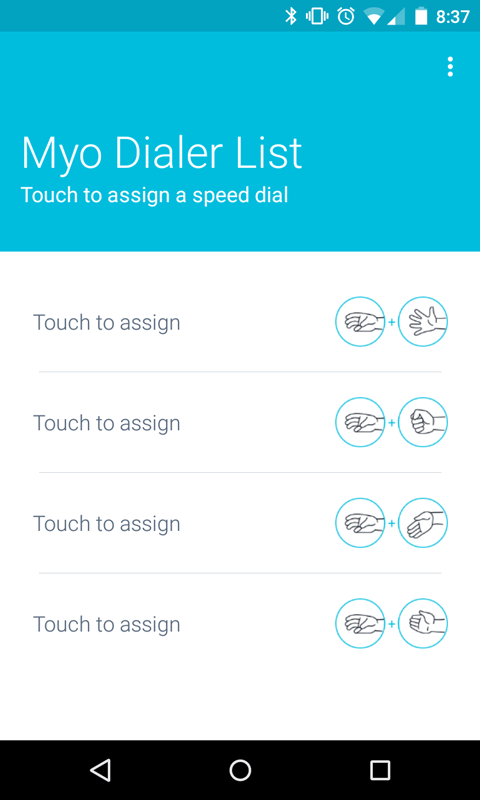
It turned out pretty well in my opinion.
T+18h - Integration
Now that the frontend was finally done, I started work on integrating it with the backend. Kevin submitted his backend code four hours earlier, so it had been waiting in the repo while the frontend was being polished.
Kevin based the backend off the Background.java example provided in the Myo Android SDK. It’s a background service that listens for events from the Myo armband. In Kevin’s case, he modified it so that it would launch a call intent whenever it received a pose from the Myo armband while it is unlocked. Having a background service allows users to use Myo Dialer in the background even when it has been dismissed.
Integrating it with the frontend was straightforward. I had to make some modifications so that contacts selected by the user in the frontend could be passed onto the backend, and I had to set some menu entries in the frontend so that users could choose to connect to specific Myo armbands from the app.
The greatest challenge I ran into in this case was keeping the background service alive even when the frontend was dismissed. I found that the app still worked when it was minimized, but once the app was killed by the user, it would take the service down with it. As it was 3am at this point and it was getting difficult to form coherent thoughts, I chose to accept this temporarily and to just fix it later.
I also realized at this point that I probably wouldn’t have time to work on my initial Unity idea, and that I had underestimated the time needed to complete Myo Dialer. It didn’t matter though — I learned a lot in making Myo Dialer, and I had a lot of fun doing it.

I actually discovered after the hackathon that a service needs to have a notification running in the foreground if it doesn’t want to get destroyed when the app that launched it is killed. Starting a notification on the service’s onCreate() instantly solved the problems I ran into in the hackathon.
T+24h - Google Play
Twenty-four hours later, I was having some sweet, sweet breakfast consisting of French toast and parfaits while playing Smash Bros on a Wii U someone brought in. I got destroyed pretty bad.
But anyways, as the end of the hackathon approached, we realized that we needed to put our app up on the Play Store. Brent came up with really nice images to use for our app page and wrote up our app description. I was somewhat hesitant to pay Google’s $25 developer fee, but since I’ll probably making Android apps anyway in the future, I decided to go with it.
As we were submitting our APK, the developer console complained about the APK not being zipaligned. The documentation I read about it seemed extremely vague, so I started to panic that we wouldn’t be able to submit. Fortunately, I found a Stack Overflow post detailing where to find the zipalign tool, so we were eventually able to fix the zipalign issue and submit it to the Play Store. After the hackathon, I discovered that Android Studio actually does the process automatically, and I was grabbing the wrong non-zipaligned APK instead. Oops. I blame my lack of sleep for it.
Myo Dialer is on the Google Play Store now, but back then we were anxiously refreshing the store page after submitting it, hoping that it would come up eventually. Fortunately, Google has an automated app testing process, and the page went live minutes before we were set to present our hack. Thanks, Google!
Thanks for being fast @googledevs! Finally have an app on @GooglePlay! #android #hackathon #myo #0hours
— Lloyd Torres (@ImperatorTorres) November 22, 2014T+27h - Victory
At the end of the hackathon, we presented Myo Dialer as a team. Kevin did most of the talking while I demoed the app with my Myo. We also saw everyone else’s hacks — there was a good mix of software and hardware projects. I was definitely impressed by the hacks that came out of 27 hours of work.
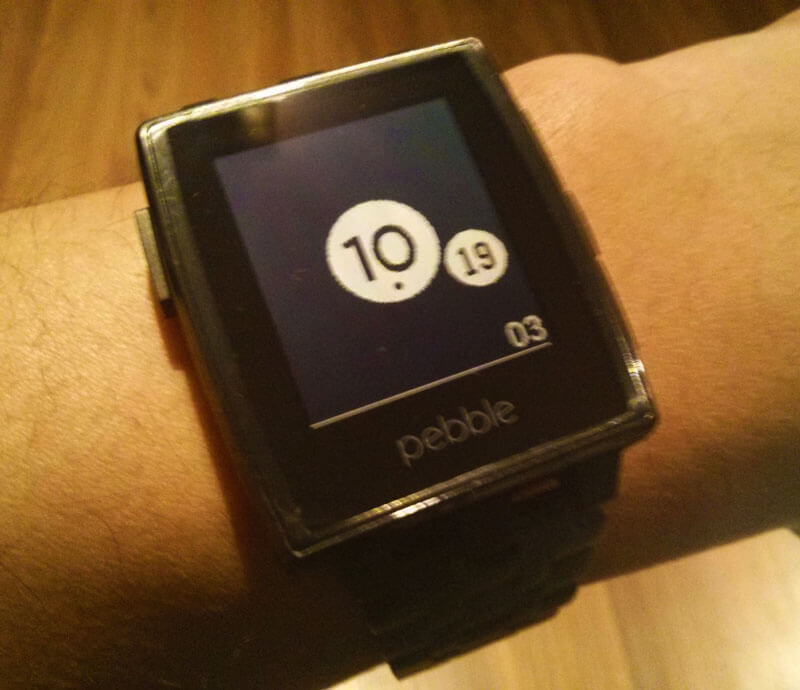
In the end, we were voted as the winners of the “App Most Likely to be #1 on Myo Market” category by Thalmic employees. We each won a Pebble Steel for our victory. :)
Having been awake for more than 24 hours, I immediately fell asleep when I got home.
T+??h - Beyond the Hackathon
I’ve been constantly improving Myo Dialer even after the hackathon, issuing updates to add features, squash bugs and support future Myo Android SDK releases. You should check it out on the Play Store and Myo Market!

